
Free Azure MFA for Global Administrators [Step-By-Step Guide]
Using any kind of administrative account without multi-factor authentication (MFA) today presents high level of risk. If you have accounts that belong to Global administrator role in Azure Active Directory you can easily enable Azure MFA for free. Let take it step by step.
With today’s sophisticated attacks on your credentials (like phishing attacks) using just password it not secure enough, especially if we know that many people use simple passwords, or they are re-using same password for different services, even for administrative accounts.
If you have accounts that belong to Global administrator role in Azure Active Directory you can enable Azure multi-factor authentication for free (but only if account is Work or School account (i.e. Azure AD account like john.smith@mycompany.onmicrosoft.com). At the moment it cannot be enabled for Microsoft Accounts (MSA, accounts with @hotmail or @outlook domain).
To get a list of all Global administrators in the Azure AD tenant you can use following PowerShell commandlets:
Connect-AzureAD
$role = Get-AzureADDirectoryRole | Where-Object {$_.displayName -eq 'Company Administrator'}
Get-AzureADDirectoryRoleMember -ObjectId $role.ObjectId | Get-AzureADUser
These commandlets are part of Azure AD V2 PowerShell. Azure AD role with display name “Company Administrator” is basically Global administrator. Output of Get-AzureADDirectoryRoleMember will give us a list of all Global administrator users:

To enable Azure MFA for an administrative account open the Azure Portal (https://portal.azure.com), open the Azure AD tile, click Users and Groups, All Users and then Multi-Factor Authentication:
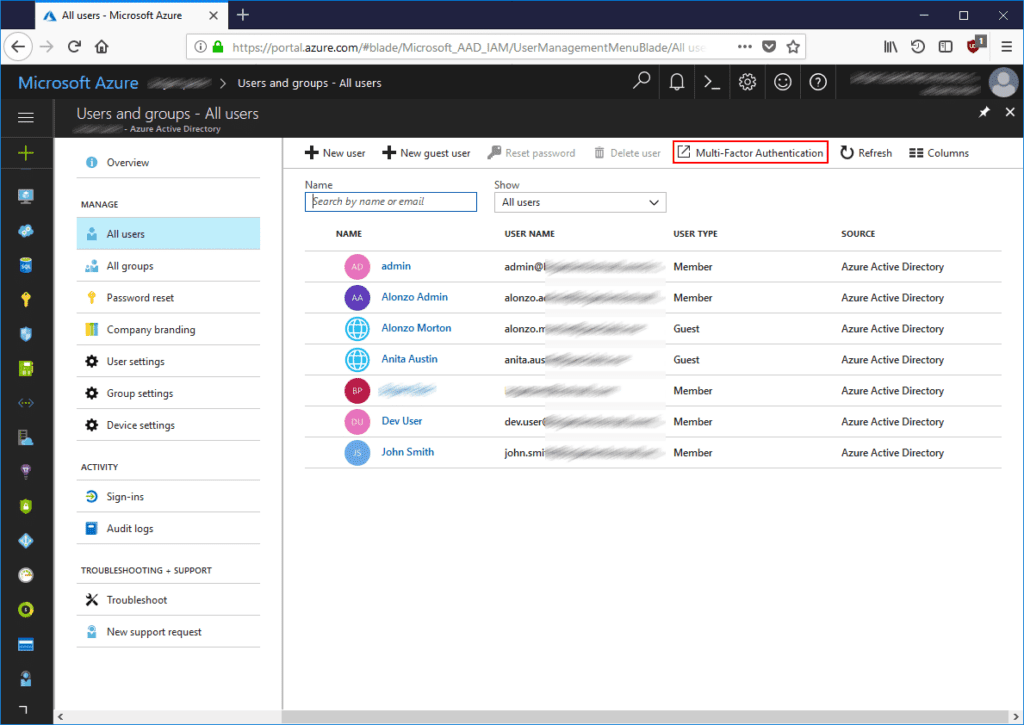
New tab will open in the browser, here we can see all users from our Azure AD tenant. Select a Global administrator account you want MFA enabled and click Enable:
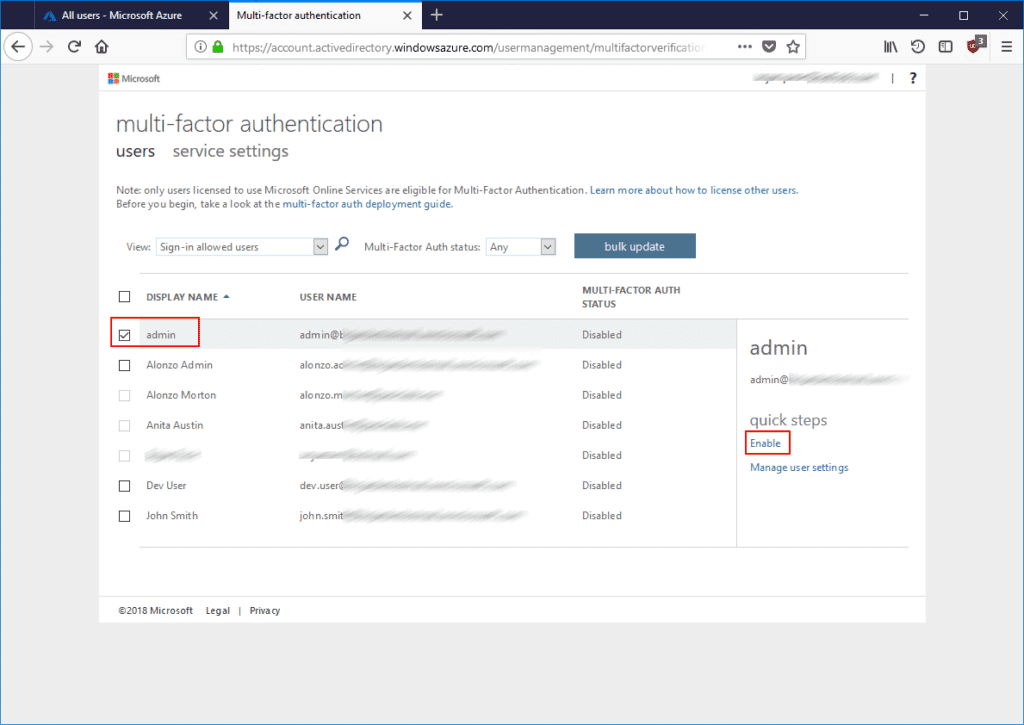
Confirm by clicking Enable Multi-Factor Auth and Close.
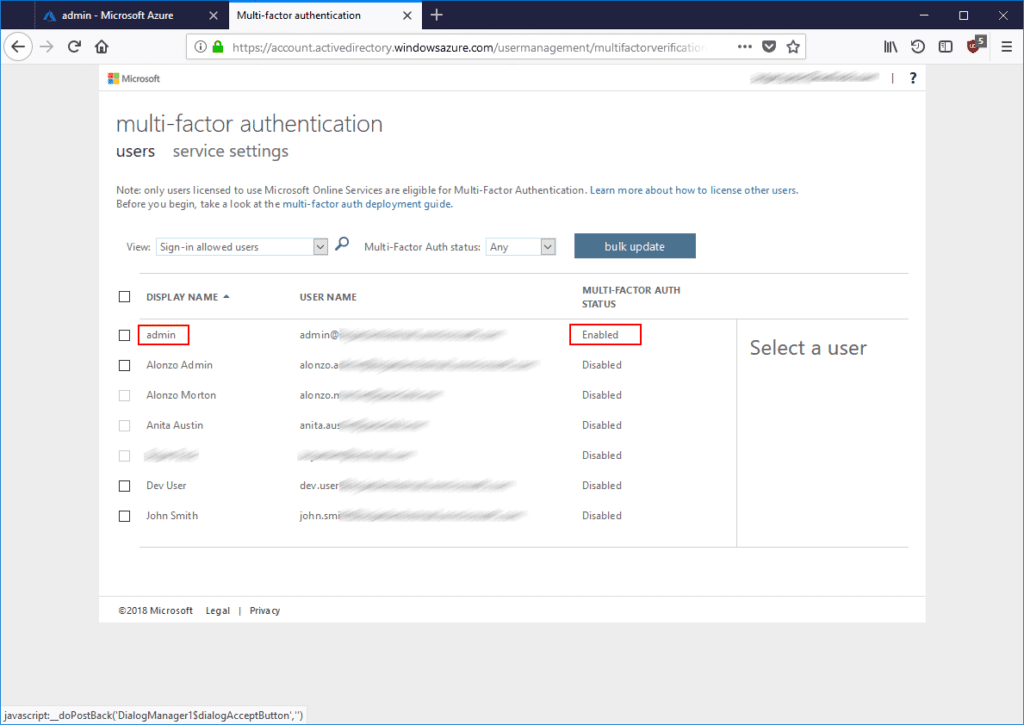
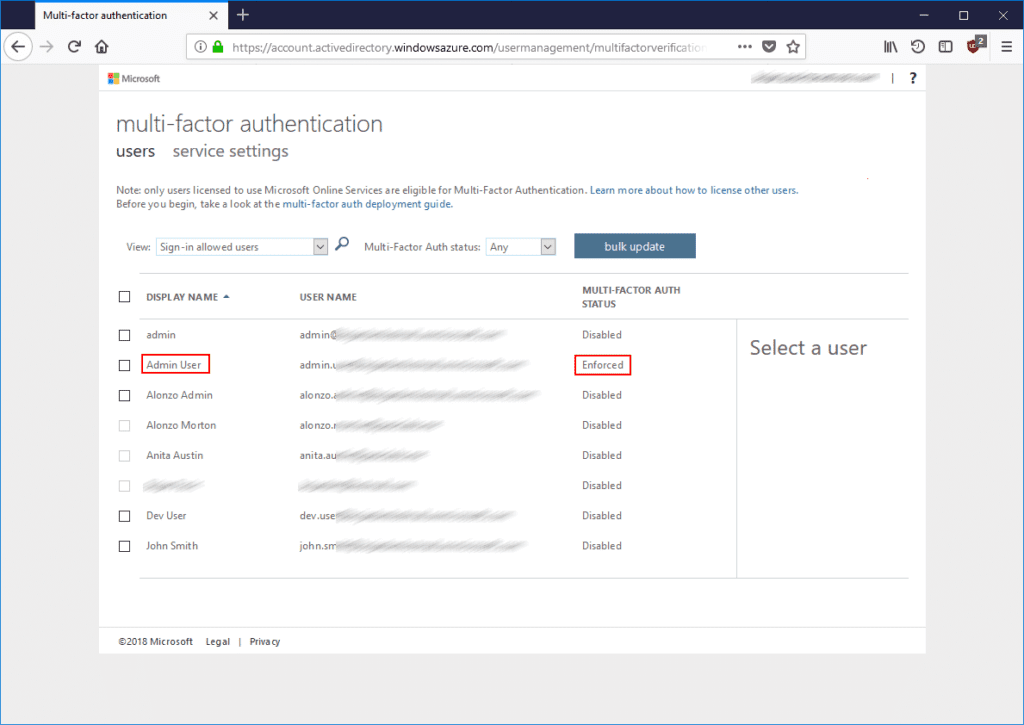
We are back on the user’s list, we can see that for our Global administrator account Multi-factor auth status is now Enabled:
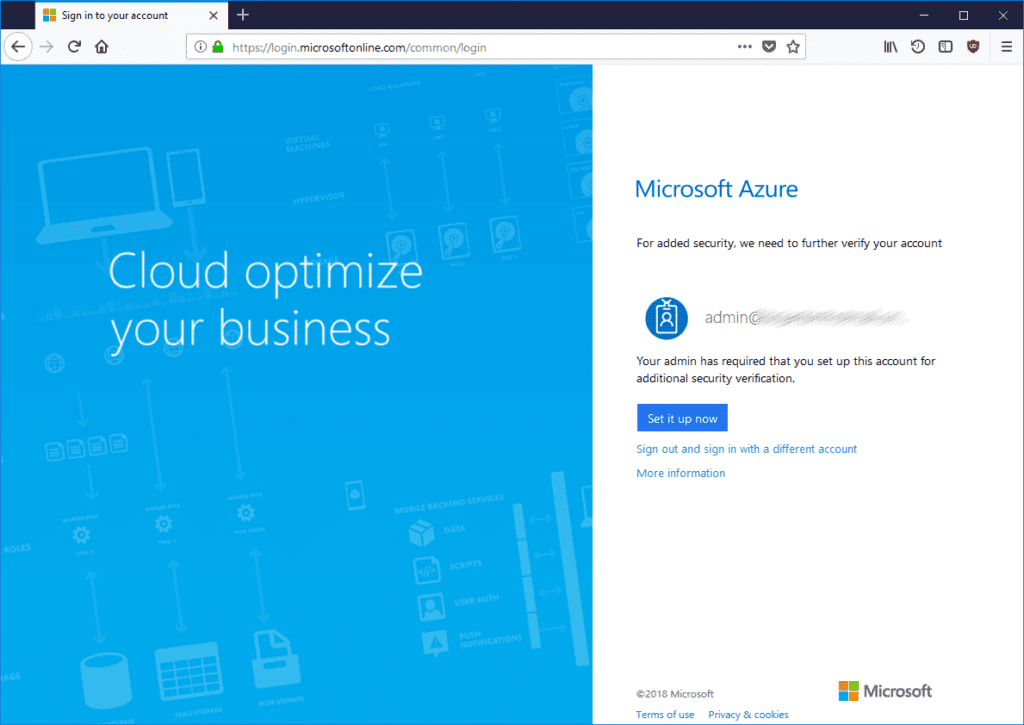
First time you (administrative user) log into Azure Portal you will be asked to complete additional security verification, to proceed click on Set it up now:
You can choose between different additional security verification methods:
- Call or text to mobile phone
- Call to the office phone
- Using mobile application (Microsoft Authenticator) to receive notification for verification or generate a verification code
In this post we’ll show how to configure additional security verification methods using mobile app.
Under How should we contact you? choose Mobile app and click Set up:
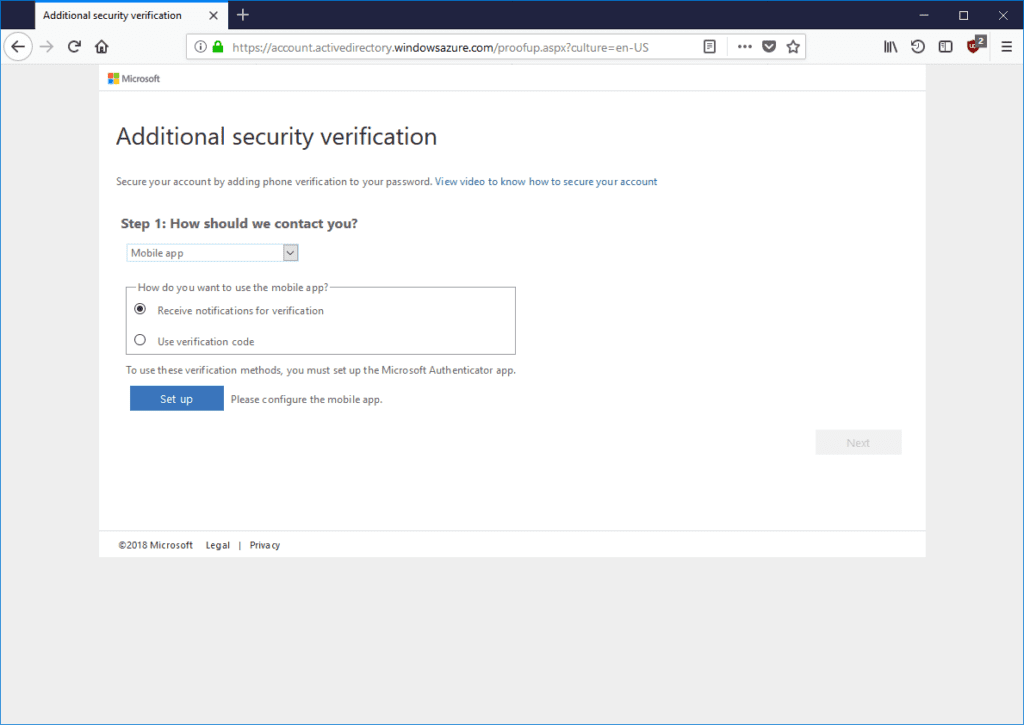
Azure MFA will generate QR code that you need to scan with Microsoft Authenticator app installed on the mobile phone. Scanning the QR code will configure the app, click Next after that.
We’ll return back to Additional security verification page which will say that mobile app has been configured:
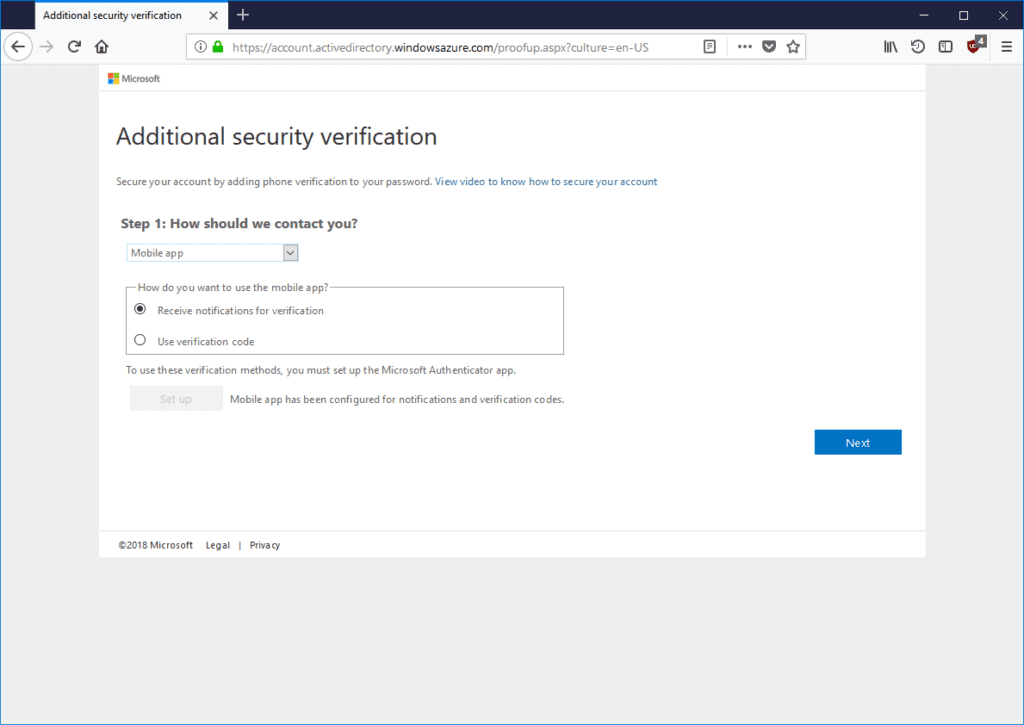
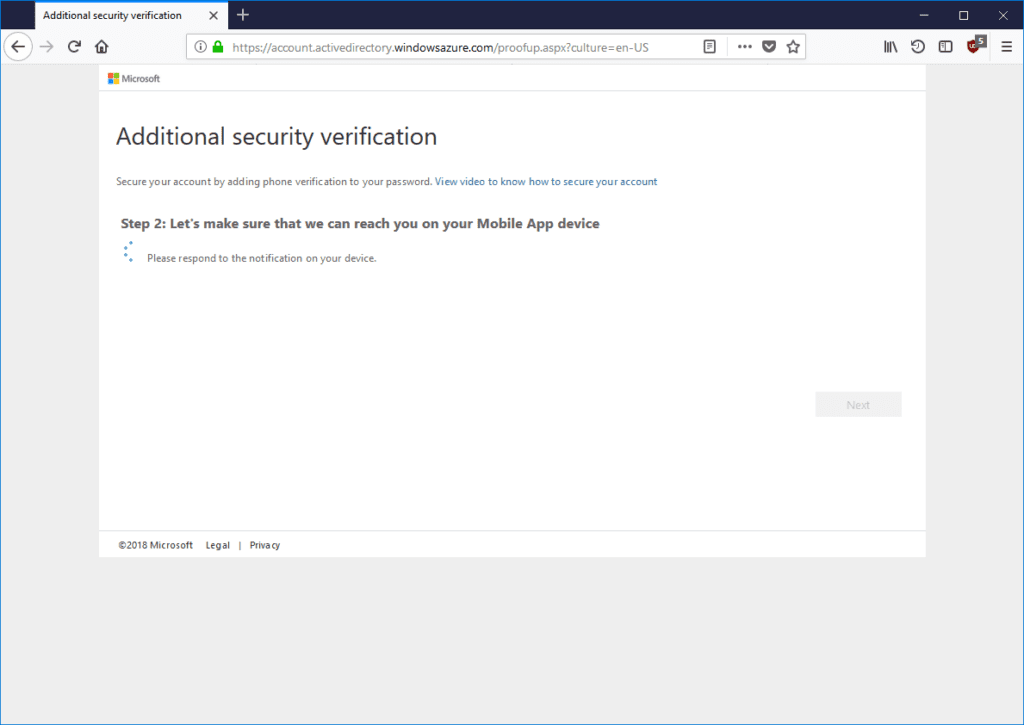
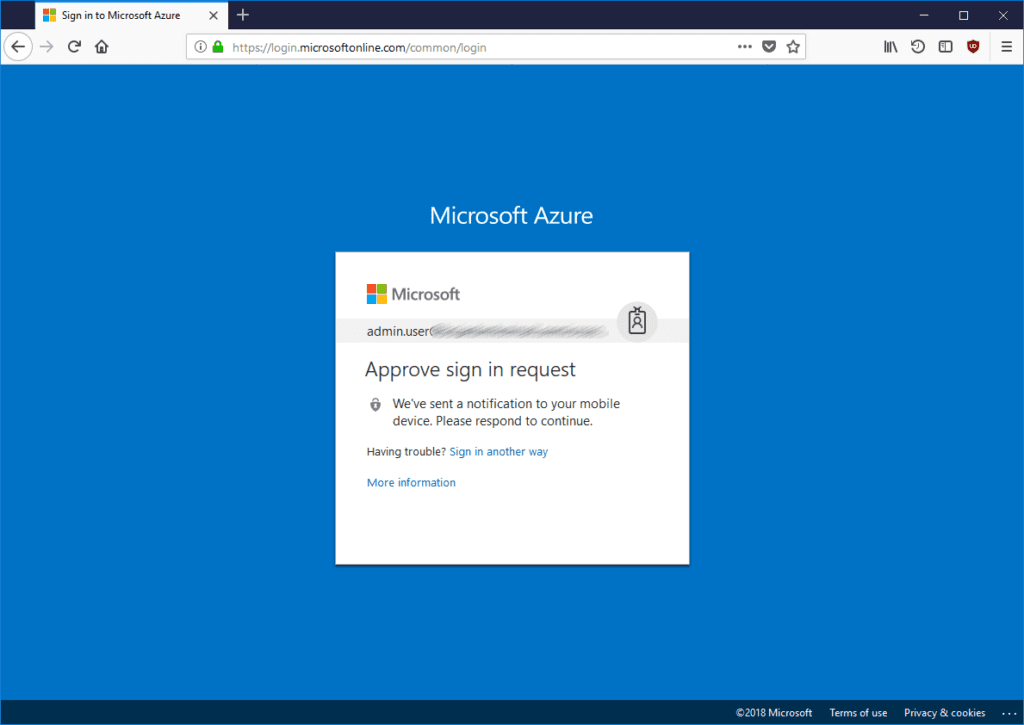
Select Receive notification for verification or Use verification code and click Next. Azure MFA can either send a notification message to the mobile phone or Microsoft Authenticator app will generate a one-time code that must be entered on Additional security verification page. In our example we have chosen notification message:
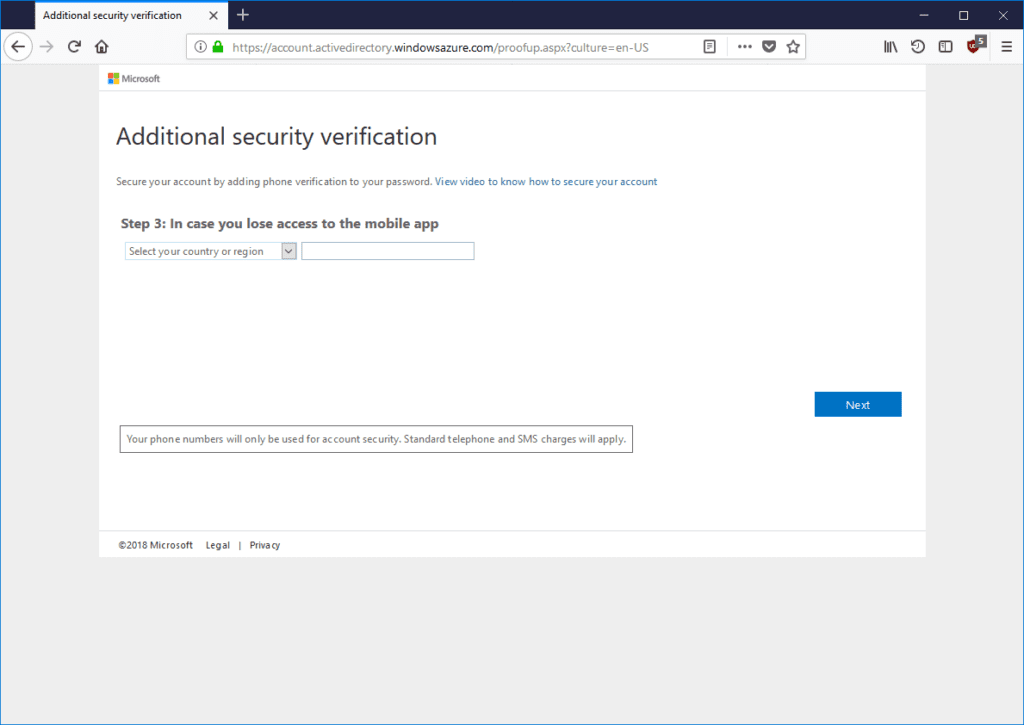
Once previous step is completed Azure MFA will ask you for mobile phone number in case you lose access to mobile app:
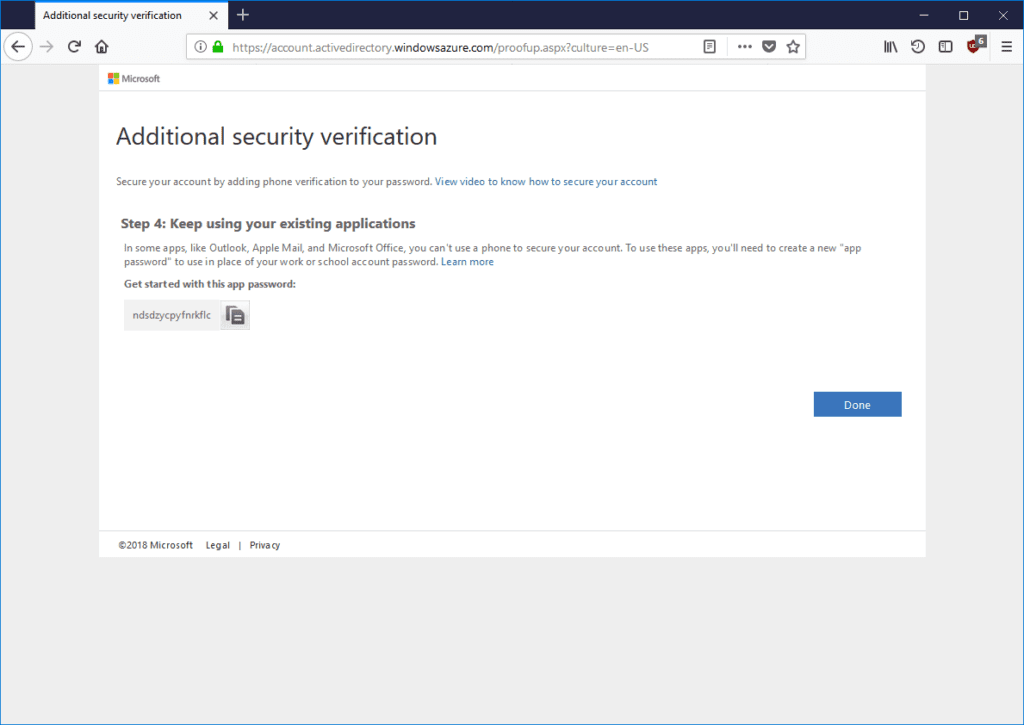
In the last step Azure MFA will generate app password. App password is not used in this scenario, Global administrator is accessing Azure Portal or Azure PowerShell so it’s not relevant for us:
Next time our Global administrator user logs to Azure Portal she will be asked to complete multi-factor authentication using the method configured in the previous steps:
If we now open list of our users we’ll see Multi-factor auth status for administrative user now says Enforced.
And that’s it, you’re all set up!
Related resource: Extend and Protect Your Identities with Azure


